There’s a reason experienced gardeners pay close attention to their feeding schedules. Yellow squash is one of the most satisfying vegetables you can grow in a home garden — but it’s also one of the most demanding when it comes to nutrients. Get the fertilizer wrong, and you’ll spend the whole season staring at lush green leaves while harvesting a disappointingly small pile of fruit. Get it right, and a single healthy plant can outproduce everything else in your garden combined.
This guide covers everything you need to know about yellow squash fertilizer — from preparing the soil before the first seed goes in, to mid-season adjustments that keep your plants producing well into late summer. The advice here applies whether you’re working with raised beds, traditional in-ground rows, or containers on a patio. The core principles don’t change. Yellow squash needs specific nutrients at specific times, and once you understand that pattern, growing it becomes far more predictable.
Let’s start with the basics and build from there.
Why Fertilizer Matters So Much for Yellow Squash
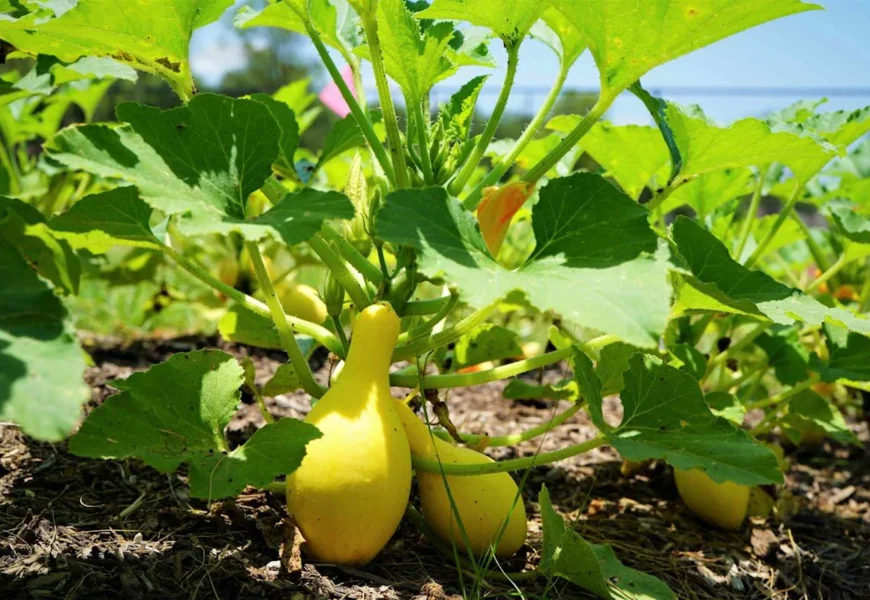
Yellow squash (Cucurbita pepo) is a warm-season vegetable that grows at a surprisingly fast pace during summer. That aggressive growth rate is part of what makes it so productive — but it also means the plant pulls nutrients from the soil faster than most garden beds can naturally replenish them.
Unlike leafy greens that mainly need nitrogen to thrive, squash has a more layered nutritional profile. It needs several nutrients working together at different stages of its growth cycle:
- Nitrogen (N) — drives early vine and foliage development.
- Phosphorus (P) — supports root strength and flower production.
- Potassium (K) — improves fruit quality, water regulation, and disease resistance.
- Calcium and Magnesium — secondary nutrients that prevent some of the most common squash problems.
- Micronutrients like boron and zinc — small amounts, but they directly affect how well fruit sets.
When any of these nutrients fall short or fall out of balance, the plant makes it known. You’ll see yellowing leaves, flowers dropping before fruit forms, stunted growth, or fruit that tastes bitter. Understanding summer squash nutrient requirements isn’t just useful information — it’s the difference between a productive plant and a frustrating one.
Understanding NPK Ratio for Squash
Every fertilizer bag displays three numbers separated by dashes. That’s the NPK ratio — the percentage of nitrogen, phosphorus, and potassium in the product. For yellow squash, these numbers matter quite a bit, and the right ratio actually shifts as your plant moves through its growth stages.
Early Growth Stage: Prioritize Nitrogen
During the first three to four weeks after planting or germination, the squash plant is focused entirely on building itself — roots, stems, and leaves. Nitrogen is the nutrient that drives this early structural growth.
A balanced fertilizer with an NPK ratio of 10-10-10 or 12-6-6 works well at this stage. It provides enough nitrogen to push strong early growth without throwing off the balance in a way that delays flowering later on.
Flowering and Fruiting Stage: Adjust the Balance
Around week four or five, something changes. Flowers appear, and the plant’s energy shifts from building structure to producing fruit. At this point, continuing to feed high nitrogen is one of the most common mistakes gardeners make.
Too much nitrogen during flowering causes the plant to keep pushing leafy growth instead of channeling energy into fruit. Flowers drop, fruit production slows, and you’re left wondering what went wrong.
This is when you switch to a formula closer to 5-10-10 or 3-15-15 — lower nitrogen, higher phosphorus and potassium. It’s a simple adjustment, but it makes a real difference in how much fruit your plants actually set.
Mid to Late Season: Keep Potassium Levels Steady
As summer stretches on and the plant enters sustained fruiting mode, potassium becomes the most important nutrient to maintain. It keeps developing fruit firm, supports sugar content, and helps the plant hold up against late-season diseases like powdery mildew. A low-nitrogen, potassium-rich fertilizer applied every two to three weeks keeps production moving in the right direction.
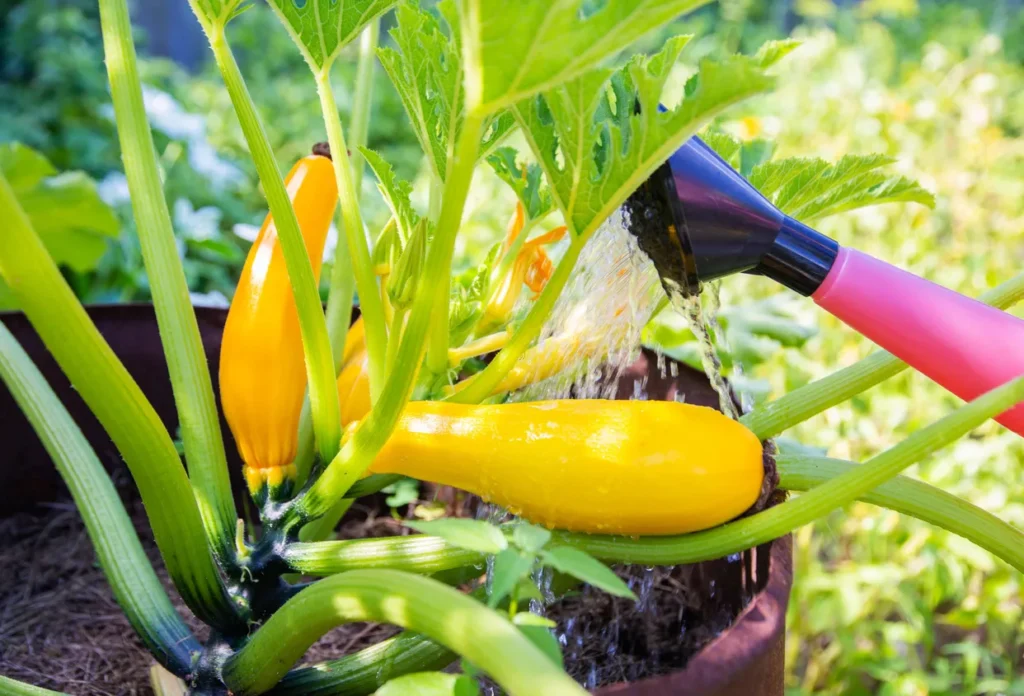
Best Fertilizer for Squash Plants: Types Compared
The market offers a wide range of fertilizer options, and the best choice depends on your soil, your schedule, and how you like to garden. Here’s a straightforward comparison to help you decide:
| Fertilizer Type | NPK Example | Best For | Application Method |
|---|---|---|---|
| Balanced Granular | 10-10-10 | Early season | Side-dress or mix into soil |
| High-Phosphorus | 5-10-10 | Flowering stage | Broadcast or side-dress |
| Liquid Fish Emulsion | 5-1-1 | Quick uptake, all stages | Foliar spray or soil drench |
| Compost | Variable | Soil building, all stages | Mix into bed before planting |
| Worm Castings | ~1-0-0 | Gentle feeding, containers | Top-dress or mix in |
| Slow-Release Granular | 14-14-14 | Busy gardeners | Mix into soil at planting |
| Kelp Meal | 1-0-2 | Micronutrients, late season | Mix into soil or brew as tea |
Each of these has a legitimate place in a well-managed garden. Many experienced growers don’t limit themselves to just one option — they combine organic amendments at planting time with liquid fertilizers during the season, getting the benefits of both approaches.
Organic Squash Fertilizer Options That Actually Work
Synthetic fertilizers are effective and fast-acting, but organic squash fertilizer options have real advantages that go beyond just the nutrient numbers. They build soil health over time, support the beneficial microbes that help plants absorb nutrients, and are generally safer for the bees and pollinators that yellow squash depends on to set fruit.
Compost
Compost is the single most reliable foundation for growing yellow squash well. Working 2–3 inches of well-aged compost into the top 6–8 inches of soil before planting improves drainage, feeds soil biology, and provides a slow, steady release of nutrients through the entire season. It’s not glamorous, but it consistently produces results.
Fish Emulsion
Fish emulsion has been a staple in organic vegetable gardens for decades, and for good reason. It’s rich in nitrogen and trace minerals, it absorbs quickly, and plants respond visibly within a few days of application. Dilute it according to the label — usually around 1–2 tablespoons per gallon of water — and apply every two to three weeks as part of your regular routine.
Bone Meal
Bone meal is an excellent slow-release phosphorus source. Working it directly into each planting hole before transplanting gives the roots immediate access to phosphorus from the start, supporting strong early root development and setting the plant up for a productive flowering cycle later on.
Blood Meal
With an NPK profile around 12-0-0, blood meal delivers a concentrated burst of nitrogen. It’s most useful early in the season, particularly in soils that test low on nitrogen. Use it carefully — too much causes leaf burn and can actually delay flowering by pushing too much vegetative growth.
Kelp Meal and Seaweed Extract
These are genuinely underappreciated in most vegetable gardens. Kelp provides trace minerals and natural growth compounds that support healthy cell development. Seaweed extract applied as a foliar spray has been documented in university extension research to improve stress tolerance and fruit set in cucurbits — the plant family that includes squash, cucumbers, and melons.
When to Fertilize Yellow Squash: A Practical Timeline
Timing is where a lot of gardeners quietly go wrong. Using the right yellow squash fertilizer at the wrong moment in the plant’s growth cycle can produce disappointing results — or even set the plant back.
Step 1: Before Planting — Soil Preparation
This step matters more than any single in-season application, and it’s the one most often skipped. Before seeds go in or transplants go out, prepare the soil with:
- 2–3 inches of compost worked into 8-inch depth
- A balanced granular fertilizer (10-10-10) at the recommended label rate
- Bone meal worked into each individual planting hole
This gives the roots a nutrient-rich environment to grow into from day one.
Step 2: Two to Three Weeks After Planting
By this point, the plant has established its root system and is actively growing. This is the right time for your first in-season application of yellow squash fertilizer. A balanced liquid fertilizer or a light side-dressing of granular 10-10-10 works well here. Apply it in a ring around the plant, keeping fertilizer several inches away from the stem to avoid burn.
Step 3: When First Flowers Appear
This is the critical transition point. Switch away from high-nitrogen products and move to a lower-nitrogen, higher-phosphorus formula. Many gardeners skip this adjustment without realizing it, then wonder why their beautifully leafy plants produce so little fruit. The shift in NPK ratio at this stage is one of the highest-impact changes you can make.
Step 4: Every Two to Three Weeks During Fruiting
Once fruit is actively forming, maintain a consistent yellow squash fertilizer feeding rhythm using a potassium-rich formula. Regular applications of yellow squash fertilizer every two to three weeks keep the plant producing steadily rather than tapering off prematurely.
Step 5: Late Season Refresh
If your plants are still going strong in late summer, a light application of compost tea or diluted seaweed extract gives them a micronutrient boost that can extend your harvest by several additional weeks without pushing excessive new growth.
Squash Plant Feeding Schedule: Simple Weekly Guide
If you prefer a clear week-by-week structure, here’s a squash plant feeding schedule you can adapt to whatever fertilizer products you’re using:
- Weeks 1–2: No additional fertilizer needed if soil was properly prepared before planting.
- Week 3: First in-season application — balanced granular or liquid (10-10-10).
- Week 5: Transition to lower-nitrogen formula as first flowers emerge.
- Week 7: Apply a liquid potassium-rich fertilizer during active fruit development.
- Week 9: Second liquid application; add a foliar seaweed spray if available.
- Week 11+: Light compost top-dress or diluted liquid feed every 2–3 weeks.
Following this rhythm consistently takes the guesswork out of feeding and keeps your plants in a steady state of productive growth throughout the season.
Squash Soil Amendment: Getting the Foundation Right
No yellow squash fertilizer performs at its best in soil that isn’t ready to receive it. Even premium fertilizers underperform in compacted, overly acidic, or structurally poor soil. Addressing the foundation before planting is time well spent.
Soil pH
Yellow squash grows best in soil with a pH between 6.0 and 6.8. Outside that range, even the best yellow squash fertilizer can’t perform the way it should — nutrients may be physically present in the soil but remain chemically unavailable to the plant, meaning you can fertilize heavily and still see deficiency symptoms.
A basic soil test, available inexpensively through most local cooperative extension offices or garden centers, tells you exactly where your pH stands and helps you get the most out of every yellow squash fertilizer application you make throughout the season.
- Below 6.0: Add agricultural lime to raise pH
- Above 7.0: Add sulfur or acidic compost to bring it down
Drainage
Squash roots are particularly sensitive to waterlogged conditions. In heavy clay soils, adding perlite, aged compost, or coarse sand opens up the structure and helps water move through. Raised beds are a practical solution in areas where drainage is a consistent problem.
Organic Matter
Soil with around 5–8% organic matter retains moisture well, supports a healthy microbial population, and has the loose, aerated texture that squash roots prefer. If your soil is predominantly sand or clay, adding compost consistently over one to two seasons builds up that organic matter in a way that pays off for years.
How to Grow Yellow Squash: Beyond Just Fertilizer
Yellow squash fertilizer is an important piece of the puzzle, but it works within a larger system. Getting the other fundamentals right is what allows all that nutrition to actually translate into fruit.
Sunlight
Yellow squash is not a shade-tolerant crop. It needs a minimum of 6–8 hours of direct sunlight daily. In spots with less light than that, plants will grow slowly and produce poorly no matter how well they’re fed.
Watering
Consistent, deep watering — around 1–2 inches per week — supports better root development and more stable nutrient uptake than frequent shallow watering. Watering at the base of the plant rather than overhead significantly reduces the risk of fungal disease. Uneven moisture is also a leading cause of blossom end rot, so consistency matters here more than volume.
Pollination
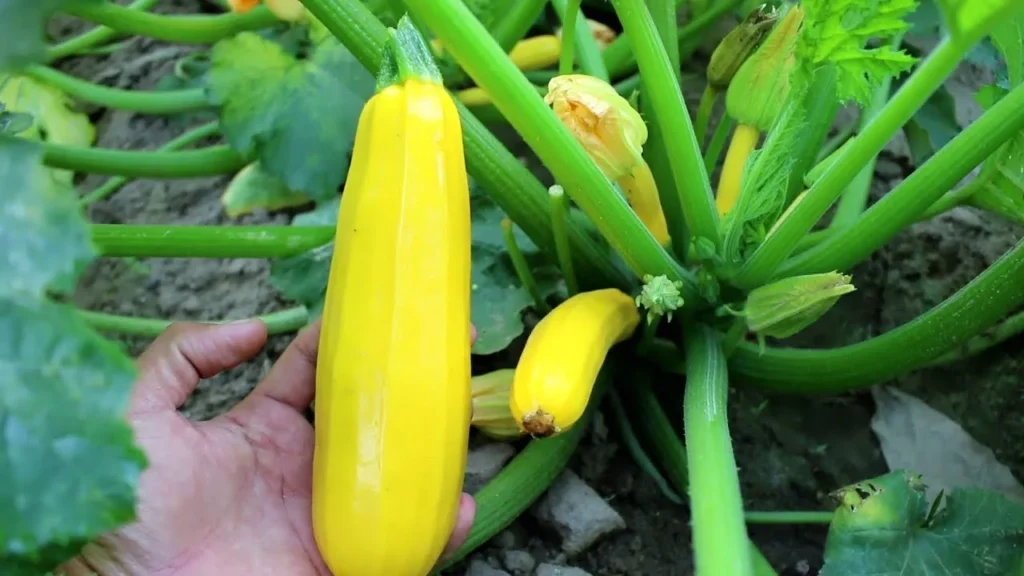
Yellow squash produces separate male and female flowers on the same plant, and it depends on bees and other pollinators to carry pollen between them. Poor pollination is one of the most common reasons for fruit drop, and it’s often misdiagnosed as a yellow squash fertilizer problem — when in reality, the soil nutrition is perfectly fine. Planting companion flowers like borage, marigolds, and lavender near your squash beds attracts pollinators and noticeably improves fruit set, working alongside your yellow squash fertilizer program to produce the best possible harvest.
Spacing
Give squash plants enough room to grow. Spacing them 24–36 inches apart in rows that are 4–6 feet wide allows for adequate air circulation, which reduces humidity around the foliage and lowers the risk of powdery mildew developing later in the season.
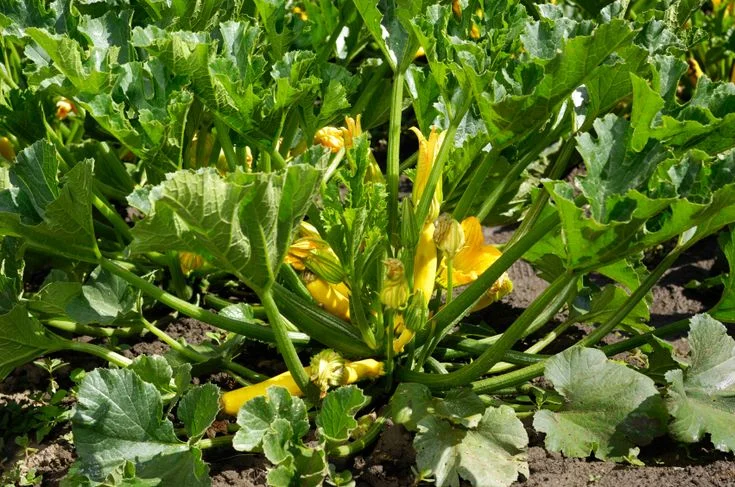
Common Nutrient Deficiency Signs in Yellow Squash
Even with a well-planned yellow squash fertilizer program in place, deficiencies can still occur — especially in heavily cropped soils or during periods of unusual weather. Recognizing the signs early allows you to respond before the problem affects yield.
| Symptom | Likely Deficiency | Quick Fix |
|---|---|---|
| Yellowing older leaves | Nitrogen | Fish emulsion or blood meal |
| Purple-tinted leaves | Phosphorus | Bone meal or high-P fertilizer |
| Brown leaf edges | Potassium | Potassium sulfate or wood ash |
| Blossom end rot | Calcium | Calcium spray or lime |
| Distorted new growth | Boron | Diluted borax solution |
| Pale yellow new leaves | Iron or Magnesium | Epsom salt; chelated iron |
Garden Vegetable Fertilizer Application: Tips for Better Results
Choosing the right yellow squash fertilizer is one part of the equation. Applying it correctly is the other.
- Never apply fertilizer to dry soil. Water thoroughly before and after any granular application. Dry soil concentrates fertilizer salts near the roots and can cause burn.
- Keep granules away from the stem. Apply in a ring starting at least 4–6 inches from the base of the plant, extending outward toward the drip line.
- Resist the urge to over-apply. Excess fertilizer doesn’t speed up growth — it causes salt buildup that damages roots and reduces productivity over time.
- Use foliar sprays for fast response. When you spot a deficiency, a foliar application reaches the plant within 24–48 hours, much faster than waiting for a soil application to move through the root zone.
- Rotate between fertilizer types. Alternating between organic and synthetic sources, or between different product formulas, helps prevent long-term nutrient imbalances from developing in the soil.
FAQs: Yellow Squash Fertilizer
Q: What is the best NPK ratio for yellow squash?
A: A balanced 10-10-10 works well in the early growth stage. Once flowers begin to appear, shift to a lower-nitrogen formula like 5-10-10 or 3-15-15 to support fruit production rather than continued leafy growth.
Q: How often should I fertilize yellow squash?
A: Every two to three weeks during the active growing season is a reliable schedule. Feeding more frequently than every two weeks risks nutrient burn and can throw off the plant’s natural growth balance.
Q: Can I use too much fertilizer on yellow squash?
A: Yes, easily. Over-fertilizing — especially with nitrogen-heavy products — pushes leaf growth at the expense of fruit. It also creates salt accumulation in the soil that harms roots over time.
Q: Is organic fertilizer better than synthetic for yellow squash?
A: There’s no single right answer. Organic options build soil biology and are gentler on pollinators. Synthetic fertilizers act faster and give you more control over exact nutrient ratios. Many experienced gardeners use both strategically.
Q: When should I stop fertilizing yellow squash?
A: Plan to stop around four weeks before your first expected frost. Fertilizing late in the season encourages new growth that the plant won’t have time to mature before cold weather shuts things down.
Q: Why are my yellow squash flowers falling off?
A: The most common causes are poor pollination, heat stress, or excess nitrogen in the soil. Check your fertilizer ratio and make sure flowering plants have good pollinator access.
Q: Can I use coffee grounds as fertilizer for yellow squash?
A: In modest amounts, yes. Coffee grounds contribute nitrogen and improve soil texture. That said, they’re slightly acidic, so using them in large quantities over time can gradually lower soil pH. Use them in rotation with other amendments and test your soil pH annually.
Conclusion
Growing yellow squash well comes down to paying attention. The plants are productive and relatively straightforward — but they do require consistent feeding, the right nutrient ratios at the right time, and soil that’s actually prepared to support that nutrition.
The most important shift most gardeners need to make is understanding that yellow squash fertilizer isn’t a one-size-fits-all product applied once at planting and forgotten. It’s a seasonal strategy. Nitrogen in early growth, phosphorus and potassium as flowering begins, potassium through sustained fruiting — each stage has its own needs, and meeting those needs consistently is what separates a good harvest from a great one.
Start with your soil. Build a feeding schedule and stick to it. Watch your plants closely and respond early when something looks off. Do those three things consistently, and yellow squash will reward you with more fruit than you probably expected when you put those first seeds in the ground.
It’s genuinely one of the more satisfying vegetables to get right — and once you understand the role of yellow squash fertilizer in its growth rhythm, it’s hard not to look forward to growing it again every season.